

How To Make a Classic Courthouse Steps Block

Courthouse Steps Blocks are an absolute joy to make! I’ve pulled together some of my favorite classic layouts to share with you, including this classic-classic one!
Each block finished at a generous 14” and their 2½” wide pieces are jelly roll friendly (or a great way to put binding scraps to work!).
And to make it even easier to follow along, I’ve created a printer-friendly one-page PDF that you can download by signing up below!
Each one pager explains in step-by-step detail the pieces you’ll need and how to build your block, but if you’re looking for complete instructions for a Crib, Throw, Twin, Full/Queen, or King size quilt, you can find the arrangement in the shop.
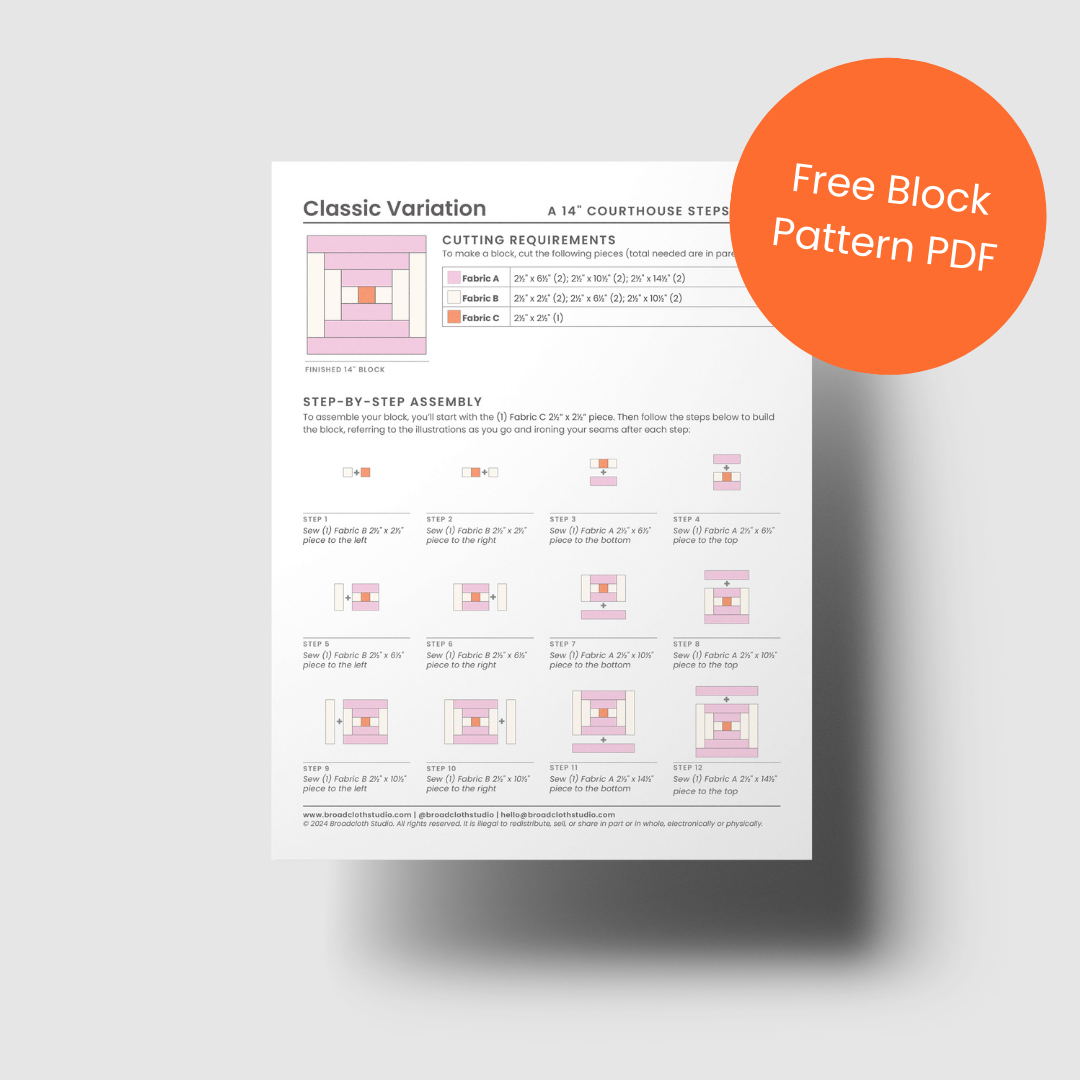
How to make a Classic Courthouse Steps Quilt Block
Fabric Requirements
Before you begin, you’ll need the following fabric pieces:
Fabric A: 2½" x 6½" (2); 2½" x 10½" (2); 2½" x 14½" (2)
Fabric B: 2½" x 2½" (2); 2½" x 6½" (2); 2½" x 10½" (2)
Fabric C: 2½" x 2½" (1)
Step-by-Step Assembly
To construct your blocks, follow the steps below, referring to the illustrations and ironing your seams between each step.

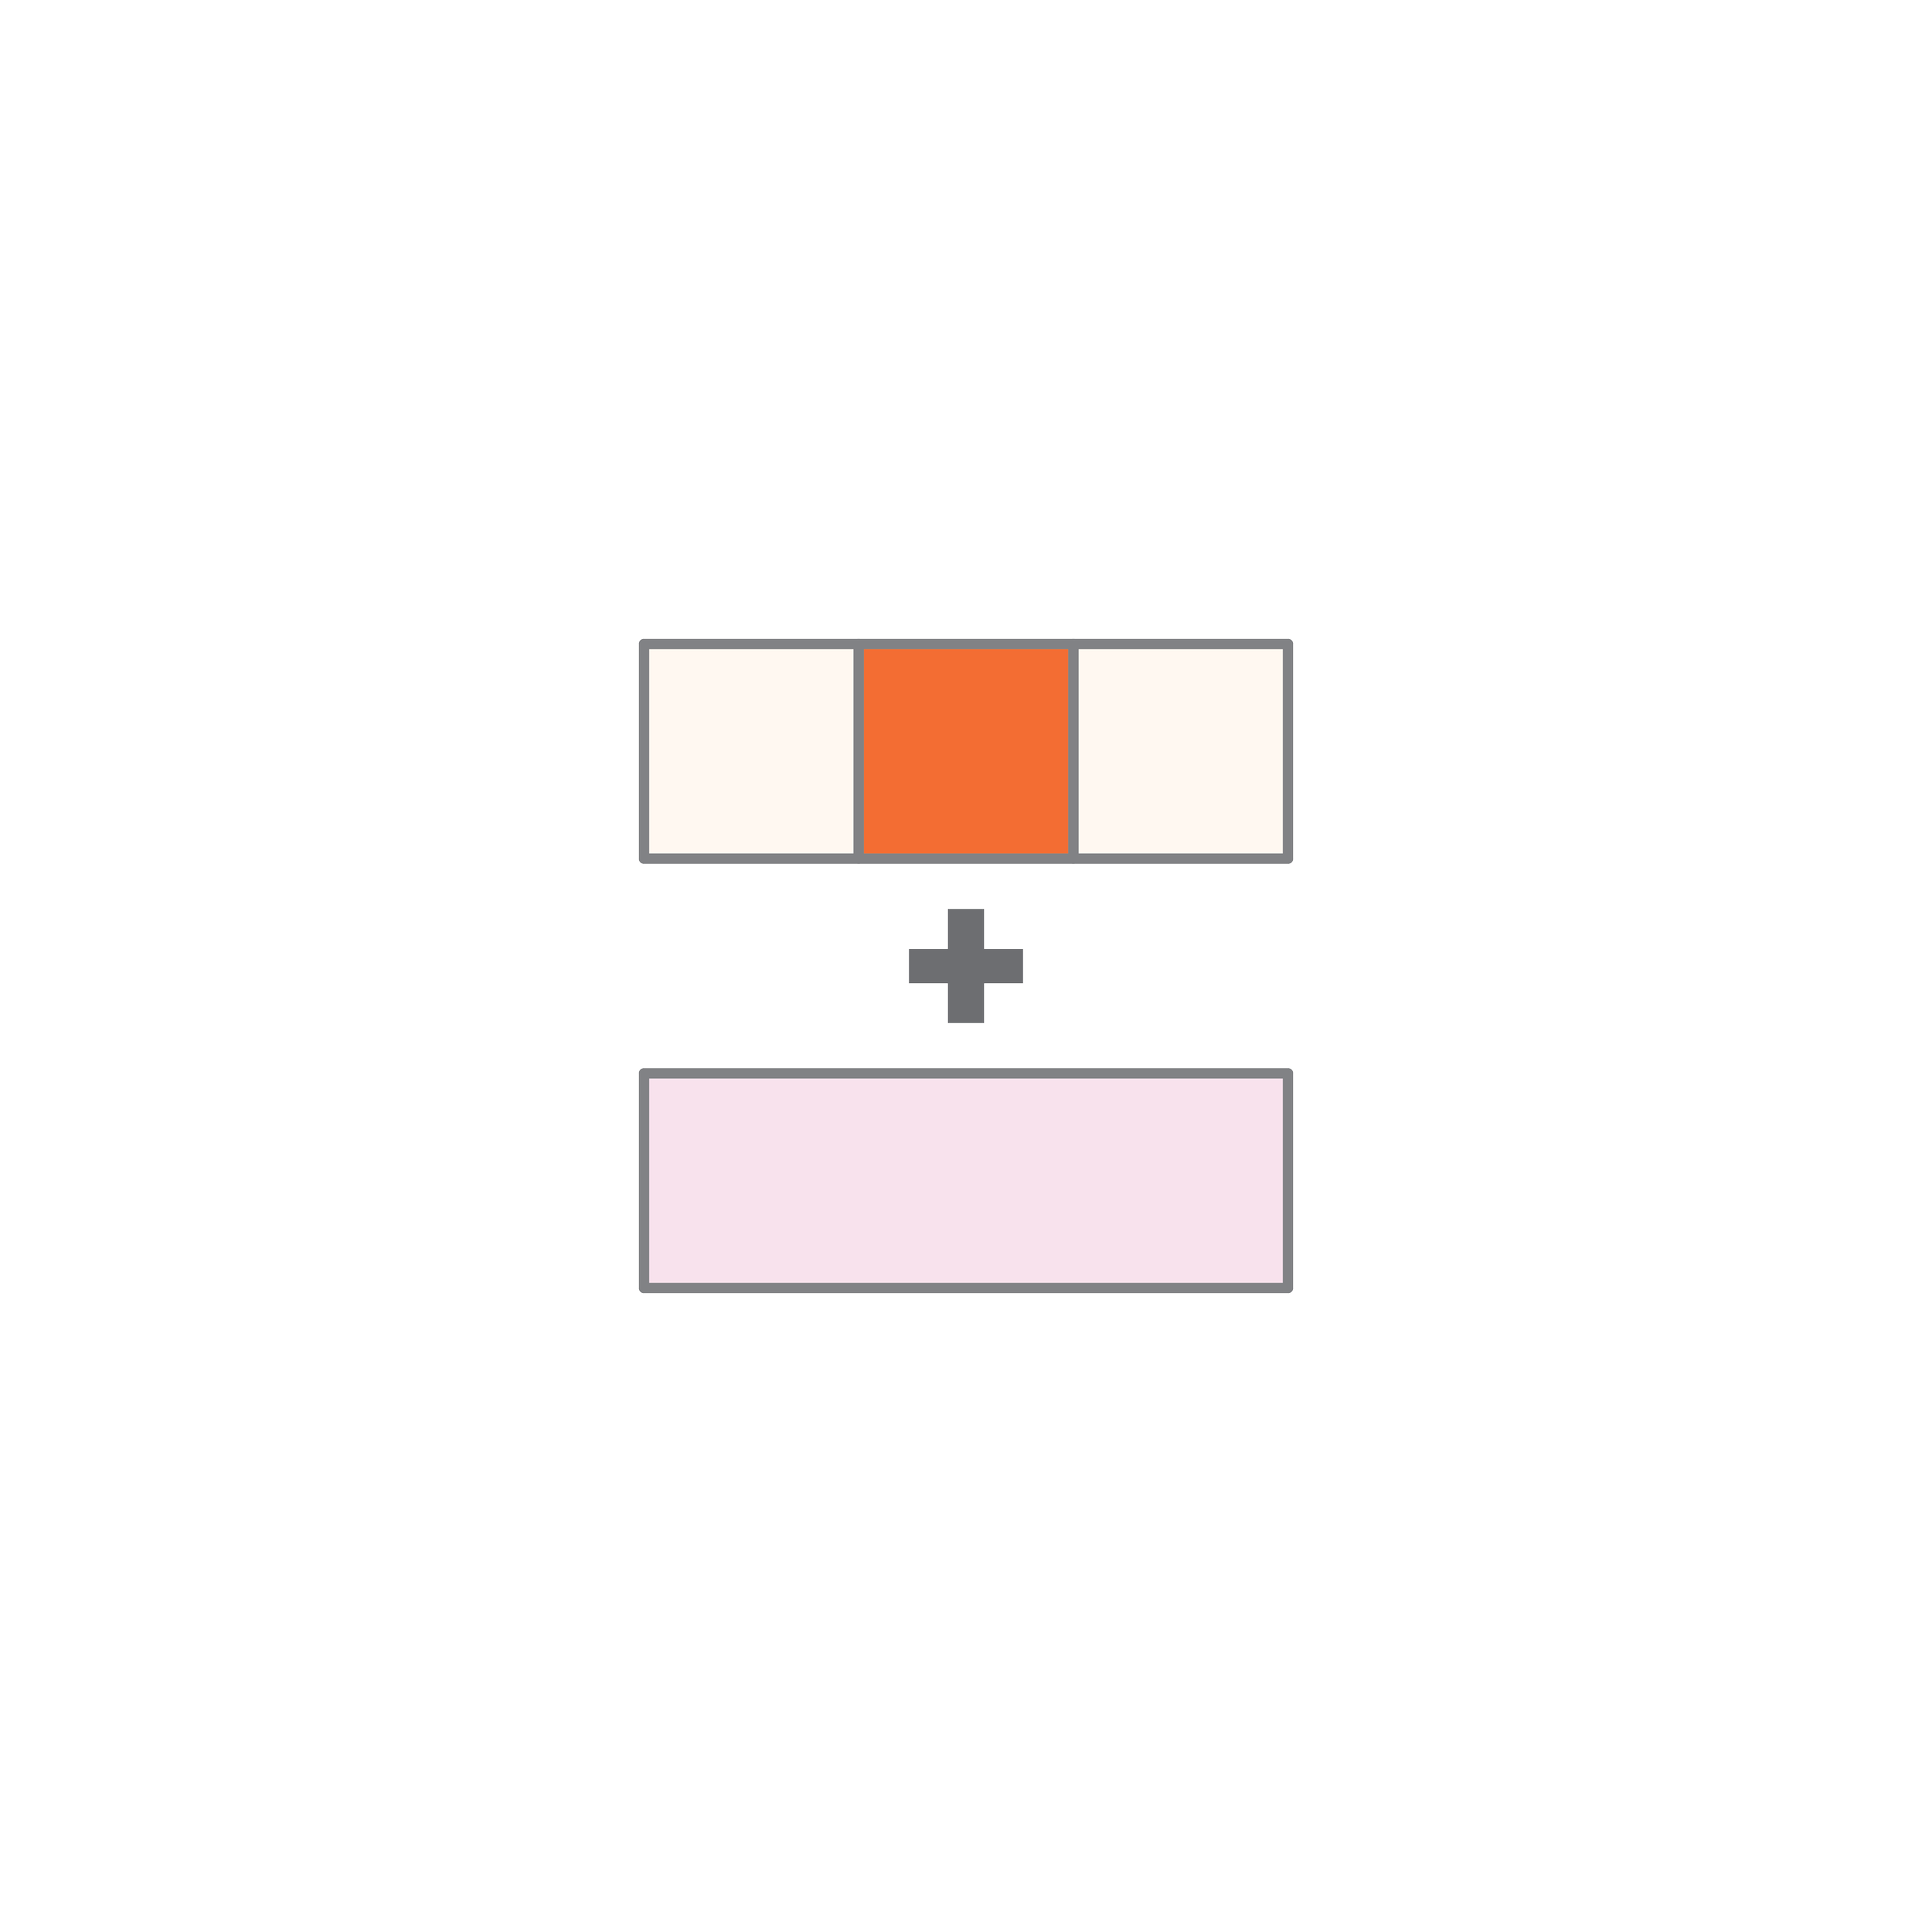
Step 1: sew (1) Fabric B 2½" x 2½" piece to the left of the (1) Fabric C 2½" x 2½" piece

Step 2: sew (1) Fabric B 2½" x 2½" piece to the right of the unit
Step 3: sew (1) Fabric A 2½" x 6½" piece to the bottom of the unit

Step 4: sew (1) Fabric A 2½" x 6½" piece to the top of the unit

Step 5: sew (1) Fabric B 2½" x 6½" piece to the left of the unit

Step 6: sew (1) Fabric B 2½" x 6½" piece to the right of the unit

Step 7: sew (1) Fabric A 2½" x 10½" piece to the bottom of the unit

Step 8: sew (1) Fabric A 2½" x 10½" piece to the top of the unit

Step 9: sew (1) Fabric B 2½" x 10½" piece to the left of the unit

Step 10: sew (1) Fabric B 2½" x 10½" piece to the right of the unit

Step 11: sew (1) Fabric A 2½" x 14½" piece to the bottom of the unit

Step 12: sew (1) Fabric A 2½" x 14½" piece to the top of the unit
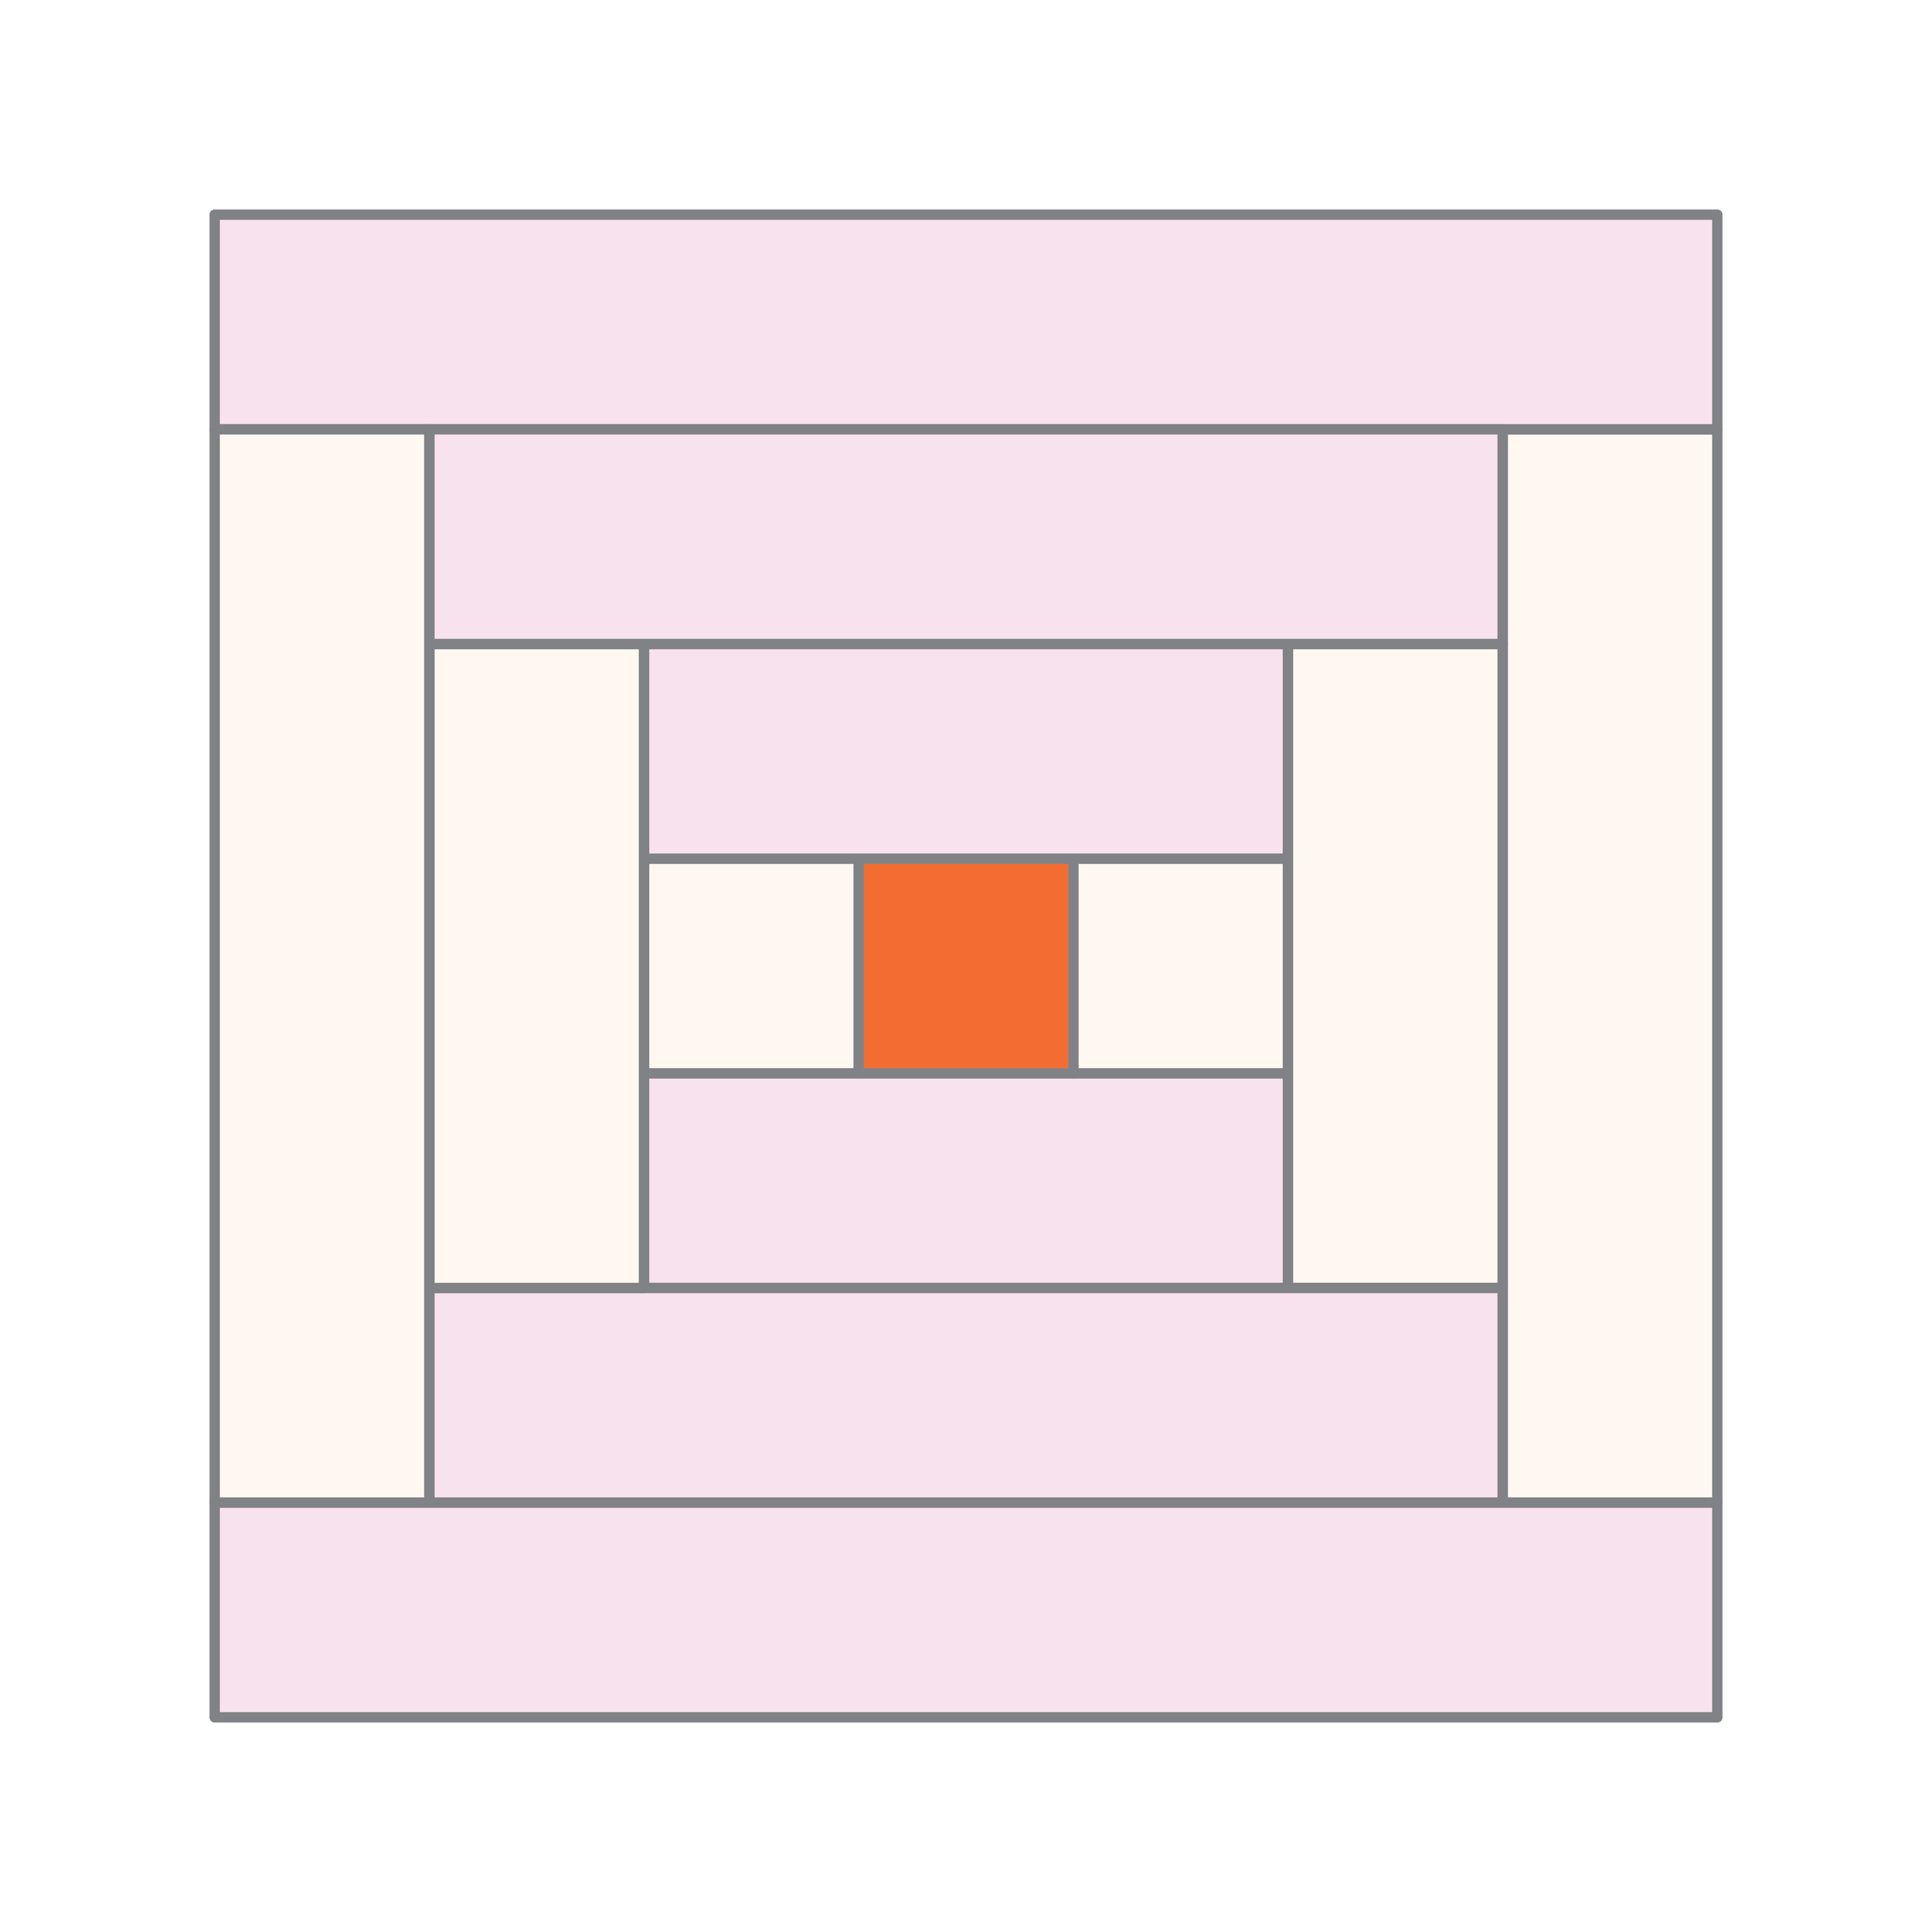
And you’re done!
Next Steps: Turn it into a quilt!
Now you’ve made your first block, it’s time to make a couple more to make a quilt! Here’s how many I would sew to make the following quilt sizes:
Crib (42" x 56"): 12 blocks
Throw (56" x 70"): 20 blocks
Twin (70" x 98"): 35 blocks
Full/Queen (98" x 112"): 56 blocks
King (112" x 112"): 64 blocks
And make sure to check out the FREE digital coloring sheet over on PreQuilt that illustrates the throw size. It’s a great way to get a sense of what the block looks like when it’s repeated (and a fun way to play with your colors!).
Looking for more classic quilt block fun?
Explore the versatility of one of quilting’s most beloved blocks with the Courthouse Steps Quilt Pattern Bundle. This collection brings together four beginner-friendly designs, each showcasing a different side of the classic courthouse steps block. From timeless layouts to bold geometric twists, these patterns are perfect for scrap-busting or creating with pre-cuts.
All four patterns are jelly roll friendly and come with detailed instructions for multiple quilt sizes (crib through king). With instant PDF downloads, cutting charts, and digital coloring sheets, you’ll be ready to start stitching right away.
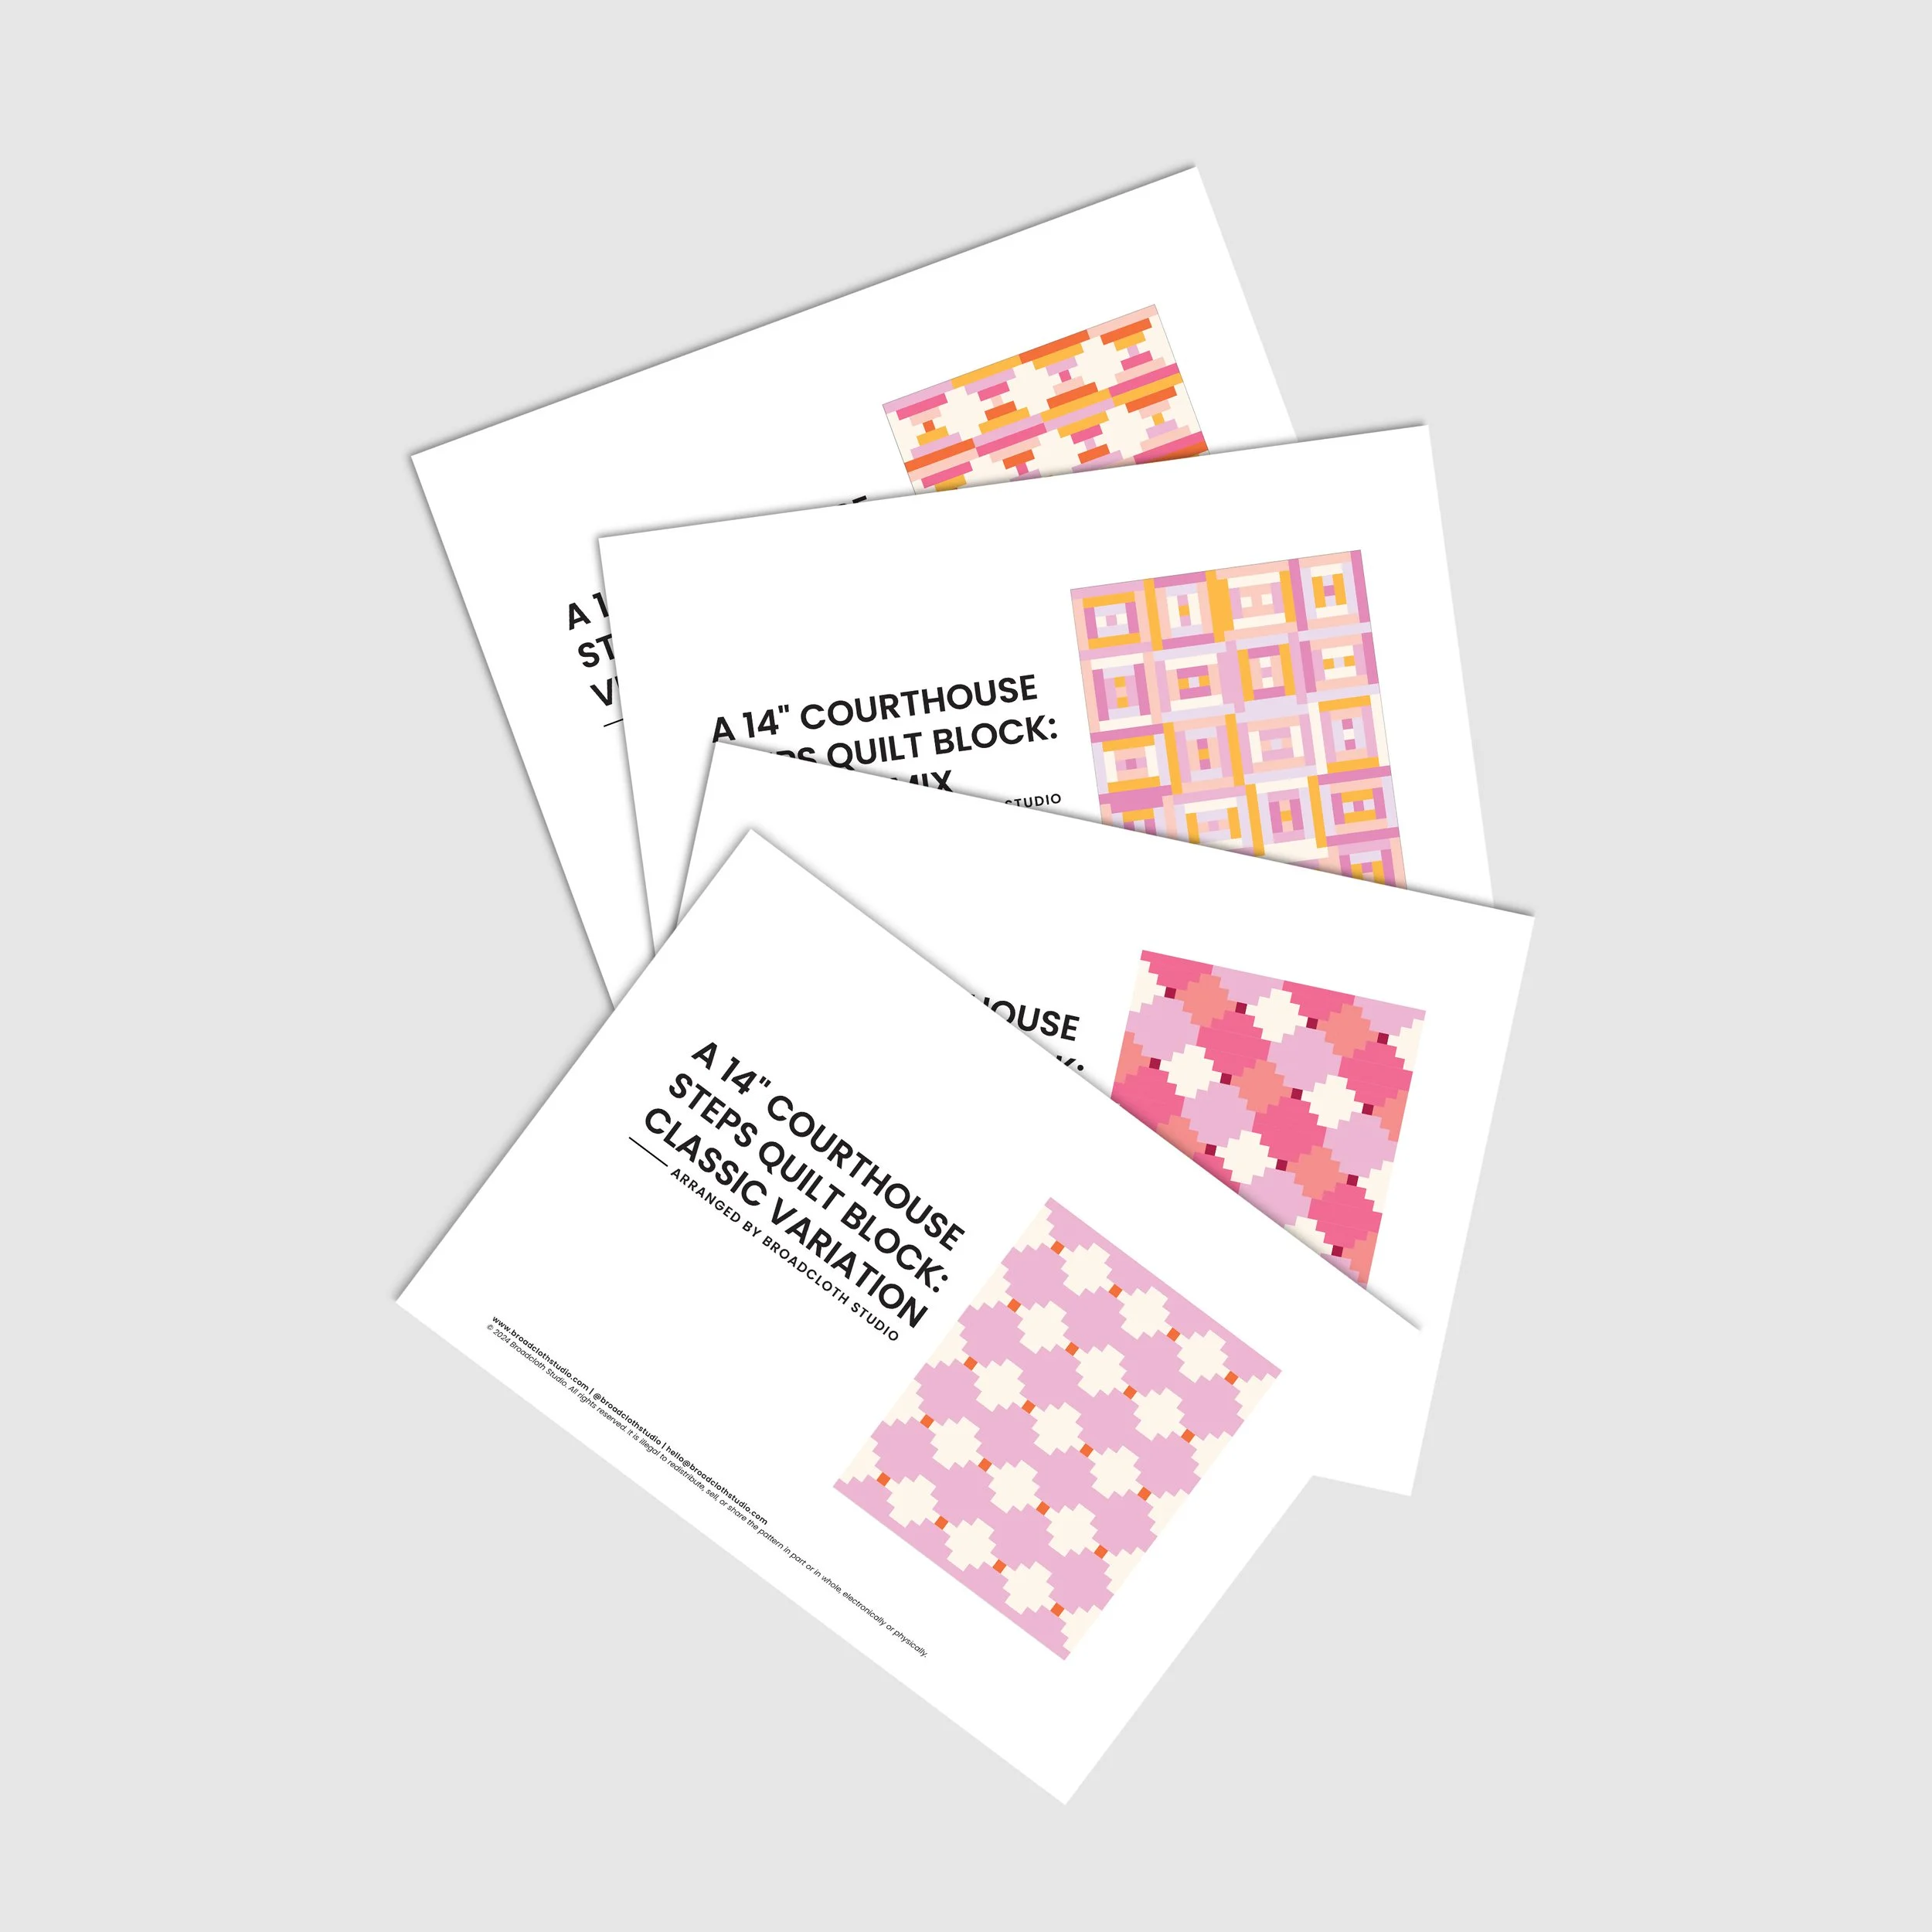
What’s Inside the Bundle
Classic Courthouse Steps: The timeless design that every quilter should have in their pattern library.
Zigzag Plaid: A fresh geometric twist, where a simple block rotation creates a bold zigzag effect.
Vertical Waves: A playful arrangement that turns courthouse steps into a flowing, dynamic pattern.
Scrappy Mix: A cheerful, anything-goes variation perfect for scrap bins and colorful improv.
Pattern Highlights
Quick and courthouse stesp construction
Detailed WOF cutting instructions included (as well as an overview if you’re going scrappy!)
NEW: expanded Quilt Back Assembly instructions, complete with diagrams!
Digital coloring sheet, so you can plan and visualize your quilt before cutting into your fabric
Details
Instant download PDF
Quilting skill level: Advanced Beginner
Standard American terms and measurements
Includes Crib, Throw, Twin, Full/Queen, and King size quilt patterns
© 2024 Broadcloth Studio. All Rights reserved. Resell of finished product with pattern credit allowed.
Each one-pager gives you everything you need to make the block itself — from the cut list to step-by-step assembly. If you’re ready to go bigger, I’ve put together complete instructions for turning these classic blocks into full quilts, with layouts and fabric requirements for Crib, Throw, Twin, Full/Queen, and King sizes. You can find these classic quilt block arrangements bundled together in the shop, including this very layout!
You May Also Enjoy These Quilting Tips and Guides:


